

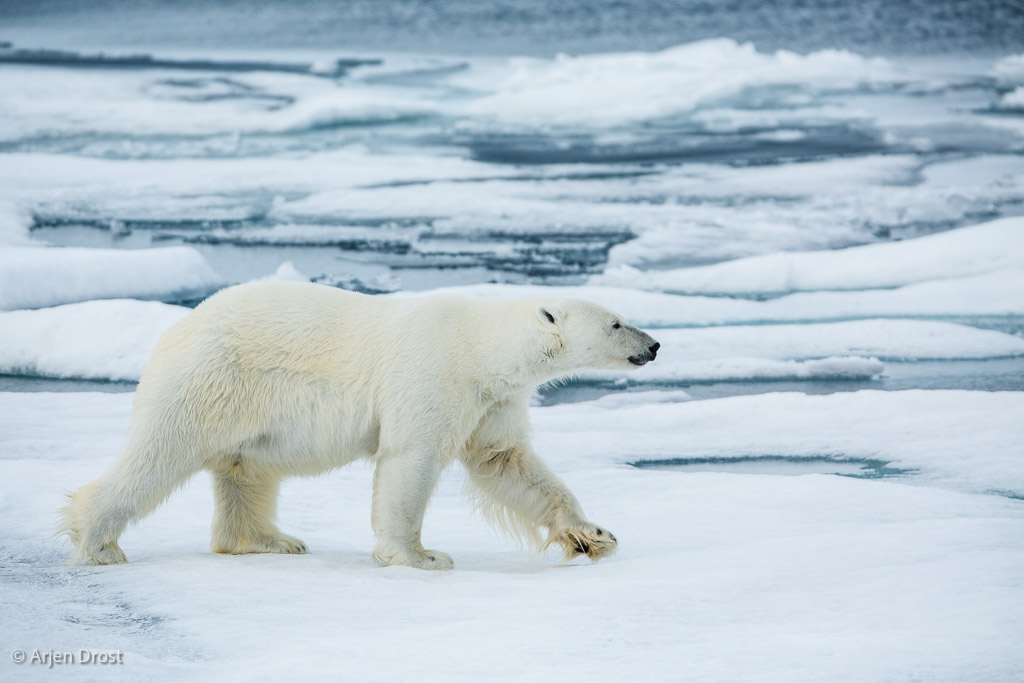
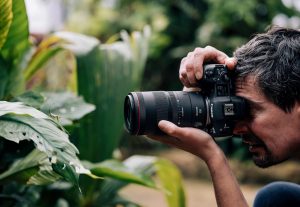
Warm blijven, maar met welke kleding?
Laten we beginnen met het warm houden van je lichaam en je benen, maar met welke kleding? Ik heb zelf meestal een stretch fleece broek aan, met daar overheen een ademende regenbroek. Ik werk veel in, bij en op het water. Voor mij is het dus extra van belang dat de buitenlaag ook waterdicht is, dat kan per persoon uiteraard verschillen. Als ik zeker weet dat het droog blijft, of dat ik niet op de grond ga liggen en waait het niet te hard, dan wissel ik m’n buitenste laag voor een gewone buitensportbroek. Hier heb ik wel gekozen voor een synthetische onderlaag. Uit ervaring weet ik dat wol hier te kwetsbaar voor is en te snel slijt.
Bij m’n bovenlichaam heb ik eerst een dunne merinowollen basislaag aan. Hier heb ik verschillende versies van, allemaal in verschillende diktes. Hoe kouder het wordt, hoe dikker de basislaag. Soms zitten aan het eind van de mouwen gaten voor de duimen, zodat je handen en polsen ook warm blijven. Vervolgens gaat er meestal een wollen trui overheen. Ook hier heb ik weer de keuze uit verschillende diktes, afhankelijk van de kou. De buitenlaag is over het algemeen een Gore-Tex jas, die wind en vocht tegenhoudt. Mocht het echt koud zijn (dan regent het toch niet meer), kan ik deze vervangen door een donsjas voor extra warmte. Als deze jas een binnenzak heeft, is dit een goede plek om de extra batterijen van je camera te bewaren. Deze verliezen veel sneller hun kracht door de kou en gaan een stuk langer mee als je ze warm houdt. Zoals gezegd kun je bij kleding variëren met de diktes en het aantal lagen, met name van de basis- of de tussenlaag.
De uiteinden van ons lichaam
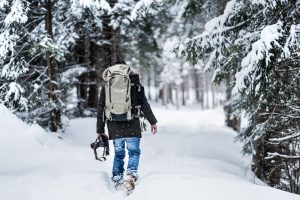
We verliezen vaak veel warmte via de uiteinden van ons lichaam: onze handen, voeten en hoofd. Het is dus van belang hier goed naar te kijken. Ook hier geldt vaak dat het laagjesprincipe goed werkt. Dus een dun paar sokken die het vocht van de voet afvoert en daarover een dikkere sok voor isolatie. Het schoeisel is natuurlijk afhankelijk van de activiteit. In sommige gevallen is het handig wat soepelere schoenen te dragen, bijvoorbeeld als er veel gewandeld moet worden. Als ik veel stil sta, draag ik liever wat grotere schoenen met een losse ‘binnenschoen’ erin. Dit houdt de voet lekker warm en de binnenschoen kan eruit genomen worden om te drogen, of om binnenshuis als slof te dragen.
Ook handschoenen horen bij de kleding, maar daar speelt nog een ander probleem. Uiteraard moet je ervoor zorgen dat je handen warm blijven, anders kun je je camera niet meer bedienen. Maar met te dikke handschoenen kun je je camera ook niet meer bedienen. Ook hier biedt het laagjessysteem uitkomst. Ik heb als het echt koud is wat dunnere handschoenen aan, waarmee ik prima m’n camera kan bedienen, met daar overheen waterdichte wanten. Bij deze wanten kan ik het vingerdeel losritsen, waardoor ik (eventueel alleen van één hand) wel m’n vingers vrij heb om de camera te bedienen, terwijl de rest gewoon extra warm blijft. Is het minder koud, dan gaan de wanten uit en heb ik alleen de normale handschoenen aan.
Welke muts prettig is, is erg persoonlijk, maar ik zou er wel een nemen die over de oren gaat. Wordt het echt koud, dan doe ik zelfs een bivakmuts op en zet ik de capuchon van m’n jas er overheen voor extra warmte. Bijkomend voordeel is dat daarmee ook m’n neus warm blijft.
Voor de extra koukleumen
Zoals gezegd houdt deze kleding je warm als je al warm bent. Maar als je lang genoeg stil staat, of een echte koukleum bent, zul je het uiteindelijk toch koud krijgen. Ook dan zijn er nog middeltjes te bedenken die warmte toevoegen. Zo zijn er hand-, rug- en voetenwarmers: zakjes, vaak voor eenmalig gebruik, die je onder je kleding stopt en vervolgens warm worden. Ook zijn er jassen, schoenzolen en andere kledingstukken met een ingebouwde verwarming. Deze sluit je aan op een USB-powerbank en maken je in no time weer warm.

Dit is deel 2 van een tutorialreeks over winterkleding. Als je deel 1 van deze tutorial nog niet hebt gelezen klik dan hier.


2 reacties
Ik heb voor fotografie in winter in Canada, waar temperaturen soms -23oC waren. Het kleding advies wat mij werd gegeven is mij goed bevallen:
There are no-name garments that are just as good as the branded gear, but it’s best to know what to look for first. Also please do note that massive deals on products like Canada Goose parkas and The North Face are often very low-quality fakes.
Photography in the winter often entails staying warm while staying still in the freezing cold for long periods of time and foregoing any warmth from physical exertion. In the deep cold, when you are not exerting yourself, what you want is loft and insulation; remember that loose-fitting clothing offers much more insulation and warmth than tight-fitting layers that are so compressed that they actually lose the ability to keep you warm. Synthetics wick chilling moisture away from your skin, are light for travel and dry much quicker than any natural fabrics (Just remember: Cotton Kills!)
SUITCASE: Please do try to pack in one soft-sided duffel bag.
BASE LAYER: I start with a base layer Under Armour UA BASE I have several tops and bottoms of various thickness 2.0 to 5.0 to ensure comfort in a variety of temperatures (remember that cotton traps moisture next to your skin, but synthetics wick moisture away from your skin).
MID LAYER: There are so many choices for your mid-layer. I like my Arcteryx Covert Hoody, and often add a synthetic Under Armour Storm Armour fleece pants over my Under Armour UA Baselayer when it is really cold.
Outerwear: Expedition weight Arcteryx bib Gore-Tex pants and Expedition weight The North Face Himalayan Down Parka (Really warm and light – perfect for travel).
For those “Hell frozen over” freezing cold days, I always have a The North Face Thermoball Jacket as mid-layer that can be worn under the big arctic parka.
Be sure to pack a soft shell of some sort in case we get a heatwave and it rains – best to be prepared! Gore-Tex works well, but so would a Poncho. Be sure it is made of a material that won’t crack if it’s cold enough to freeze (freezing rain). It should be big enough to be worn over a winter parka.
Feet: As I’ve already mentioned, nature photographers spend a huge amount of time waiting for the image, so it’s extremely important to understand that boot manufacturers rate their boots with the assumption of moderate activity; there is a huge difference in just how warm a boot is when walking or standing for any length of time. I start with a good pair of Icebreaker Expedition Mountaineer Sock and add a loose-fitting Sorel Boot (I’ve tried so many winter boots, and there’s nothing like the durability and warmth of my Sorels). MICROspikes Pocket Traction System prevents accidental (sometimes expensive and damaging) wipe-outs (but please don’t leave them on your boots in the car).
Hands: Keeping your hands warm is quite a challenge; here’s my secret: I start with a loose-fitting pair of Thin Liner Gloves, which never come off my hands. I place Hand Warmers into the palm of the liner gloves, and when it’s really, really cold, I slip another into the wristband, which warms the blood as it travels to my fingers. My choice for the outer layer is The North Face Himalayan Mitt, or my Black Diamond Mercury Mitts; be sure to buy a size, or two, larger than normal; this allows you to move your fingers around inside the gloves. The extra room and fine leather palm of the mitts allow me to use most of my camera’s buttons and dials – it takes a little practice, and seems clumsy, but better a little awkward than frozen.
**Please note there has been a lot of promotion for a “swiss army type” tactical glove that has built-in pockets for hand warmers; It’s been promoted by many photographers (all of whom make $10.00/pair profit). Please do understand these may be fine when the weather is just around freezing, but they are far from adequate when the temperature drops into the sub-zero range. I have had two people who got frostbite by insisting on trusting these gloves last year. Please be warned!
Head: Remember that most heat loss occurs through your head and get a warm Beanie hat (or Touque as we say in Canada). I often use a Balaclava when it’s really cold to protect my face from the cold and wind-chill, or simply as a scarf to stop drafts on my neck.
Neck: A simple fleece scarf will seal out any uncomfortable drafts and keep your neck nice and warm
Hallo Arjen, wat fijn dit artikel, erg bruikbaar!!
Wat betreft de handschoenen en wanten, zou je willen delen wat/welk merk jij hebt aangeschaft ?
Ik fotografeer veelal in de winter en heb voor mn koude vingers nog geen oplichter gevonden